Streacom DA6 XL
Review
A new way of thinking.
Let’s begin by saying a huge thank you to Streacom for sending this chassis out to us for review and for supporting our build projects.
The open frame chassis has been popular in the past but even more so now than ever due to the over saturated market of box cases. We have seen these builds over and over again with everyone pretty much making the same PC. There is nothing wrong with that, don’t get me wrong… it’s popular because it works but it does come a time when we want to see something abit different hitting our screens.
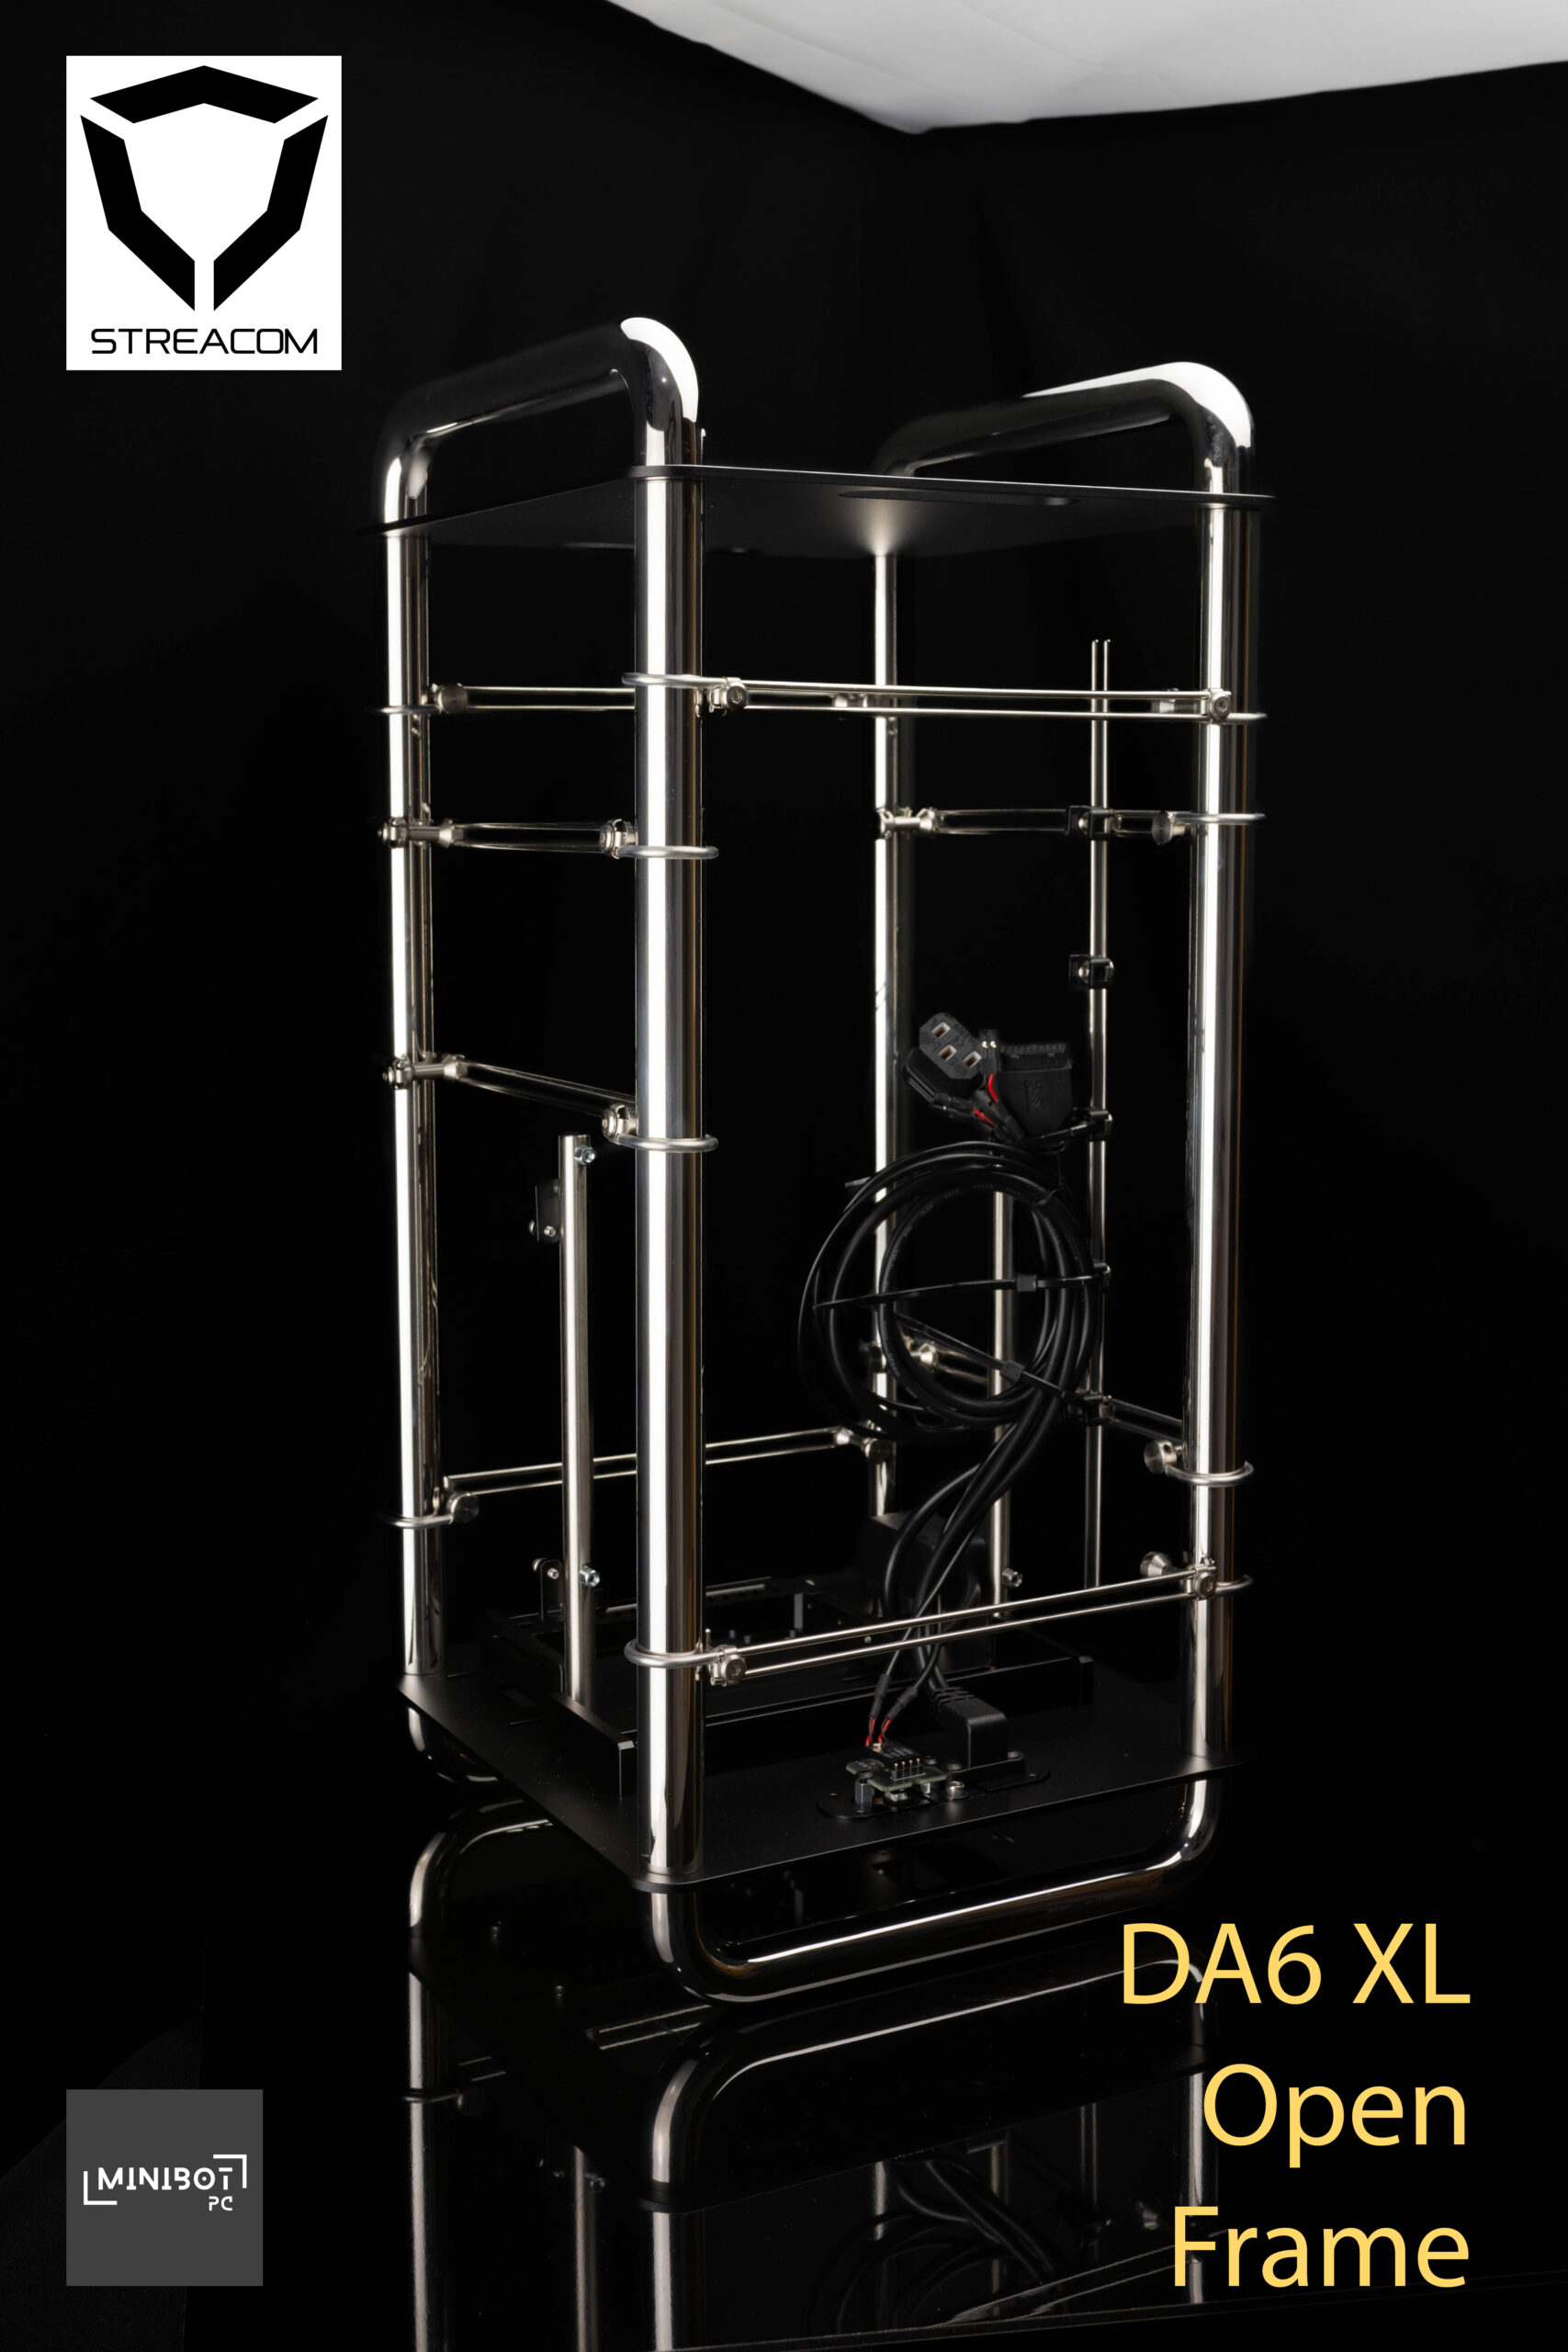
This comes in the form of open frames like the one from Streacom featured here. The DA6 series is a tubular frame with no solid walls unlike the conventional frames where there are pre installed or pre destined locations to install your components. The DA6 takes this one step further by allowing the user to mount hardware like Fans, radiators, pumps, reservoirs etc wherever you like within the limits of its confine.
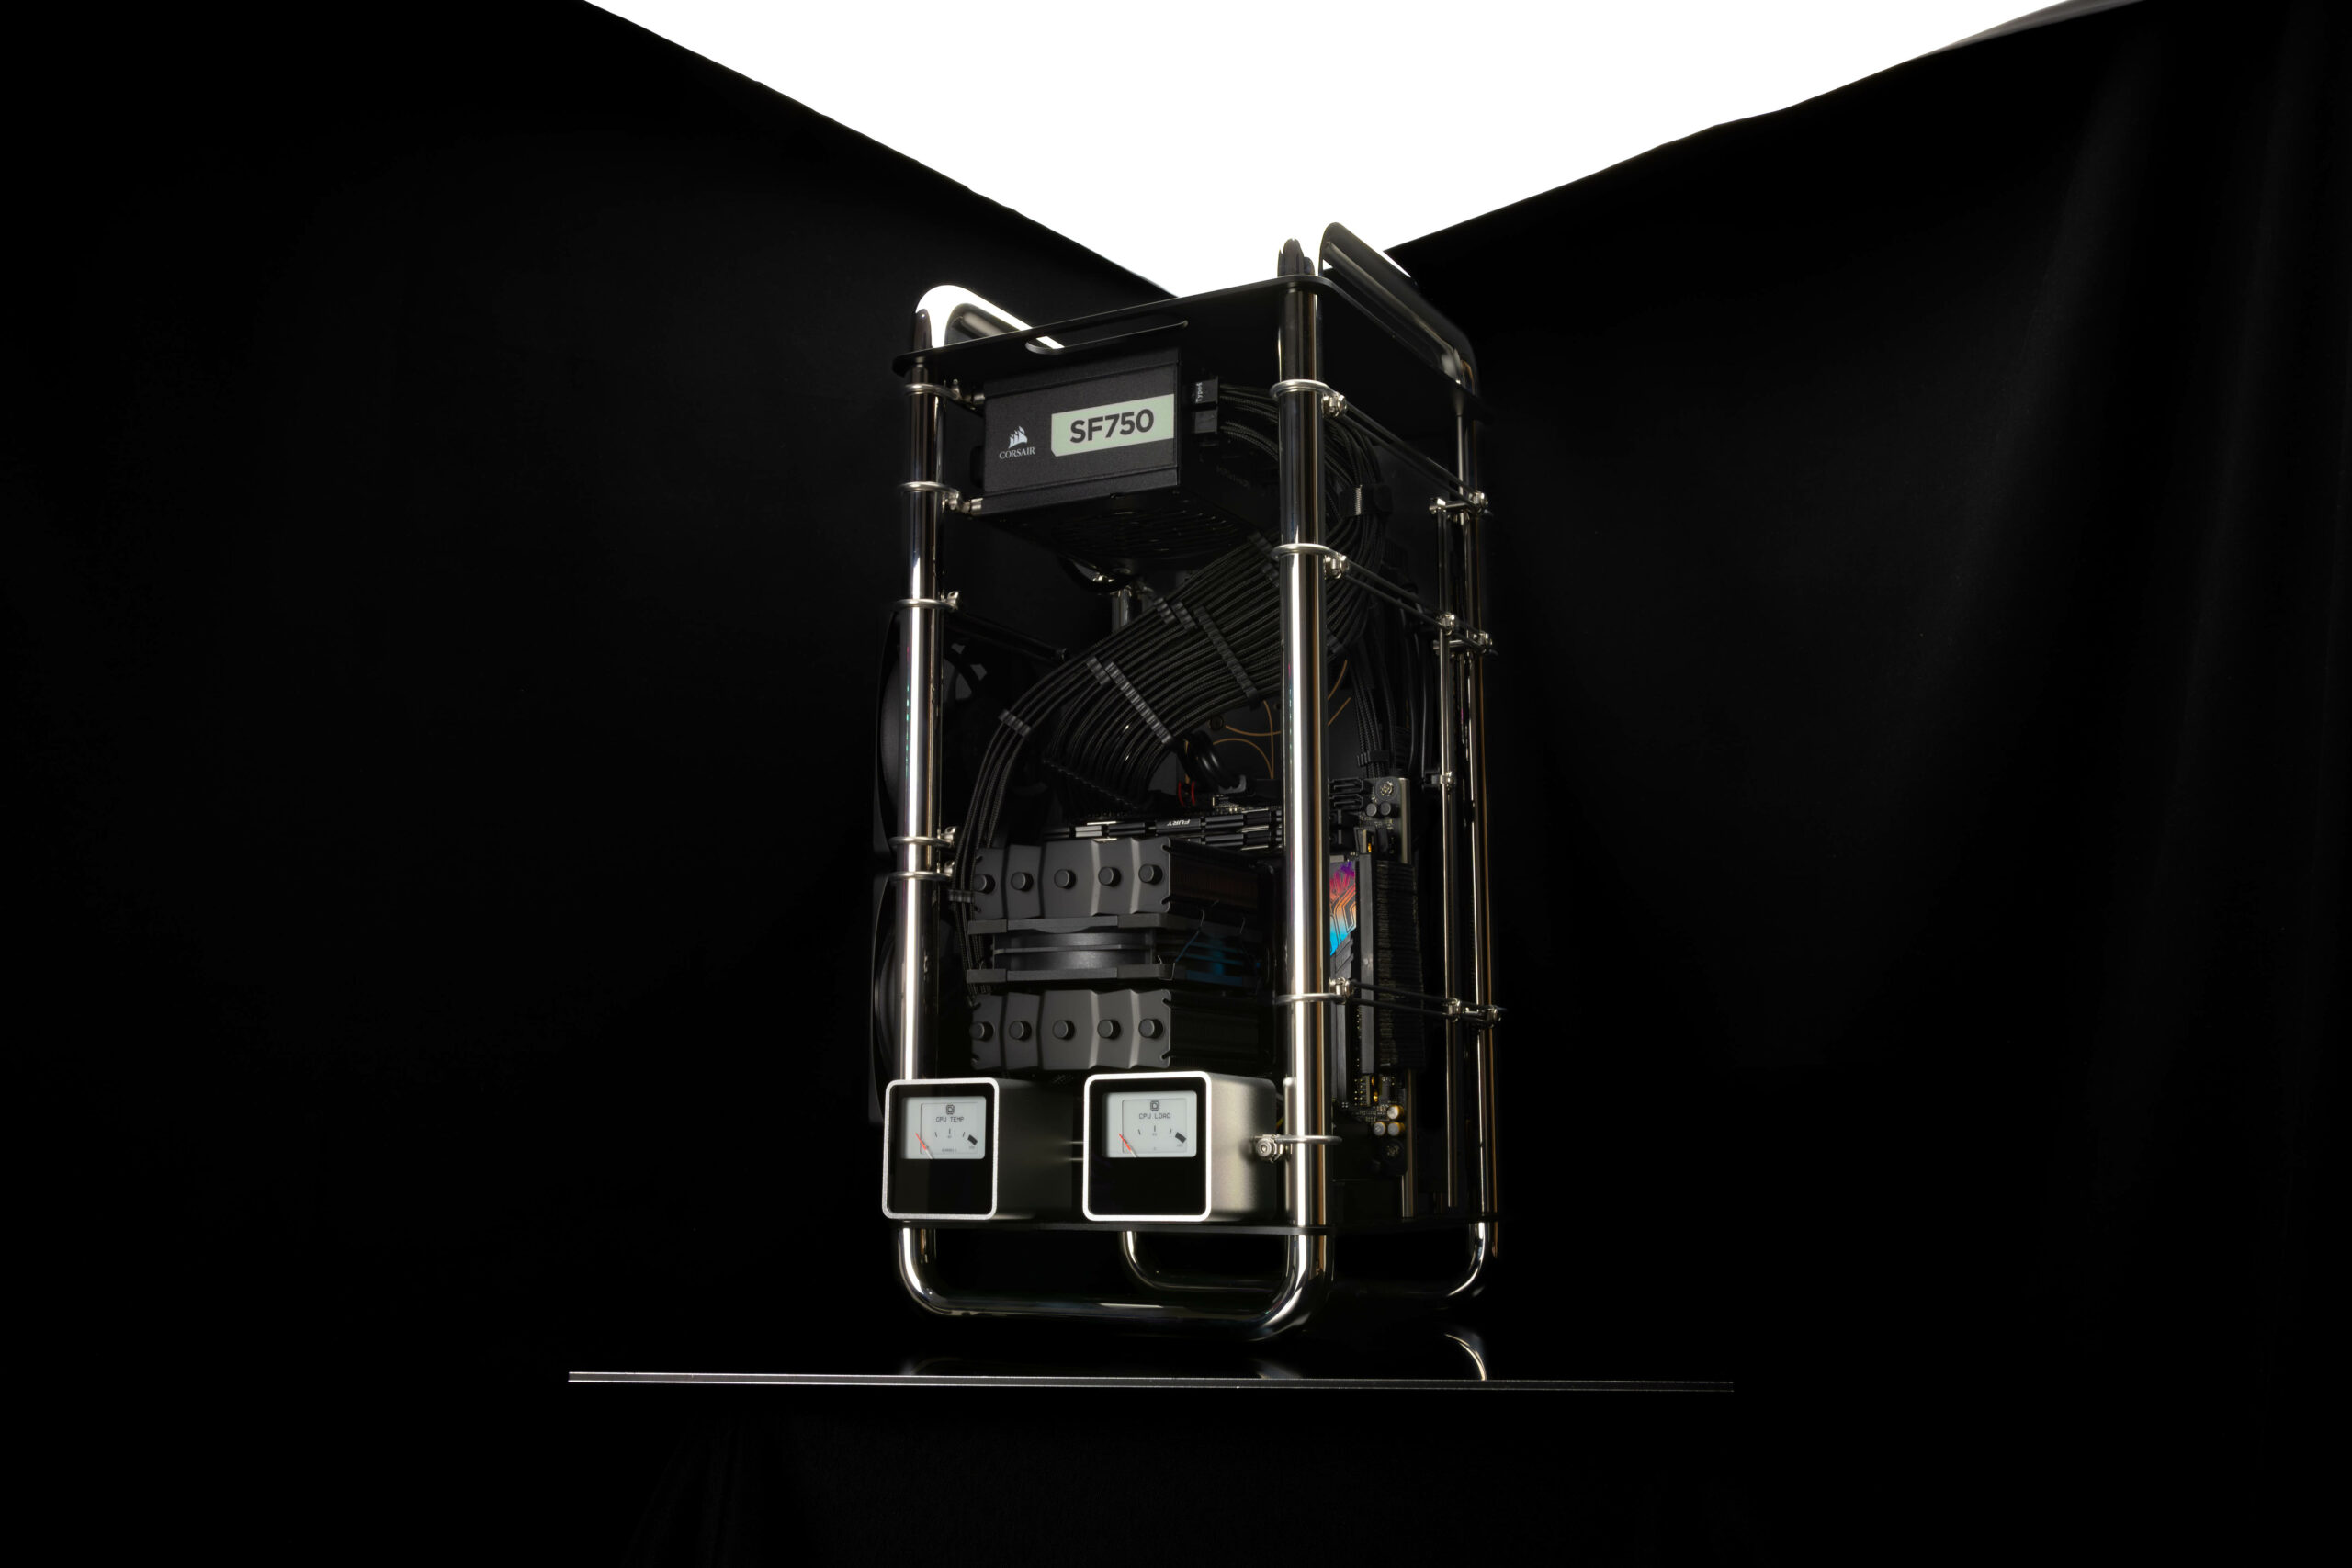
This approach allows for some very interesting configurations and ensures no 2 builds will look the same. As with all Minibotpc builds, we are not limiting ourselves either. We’ve teamed up with Bitspower for another watercooling build and we’ve christened this project with the codename Project SleekForge.
Included in the box is the frame and a bag of mounting hardware which is securely fastened to the bundle of cables inside the frame. You will find mounting hardware for the motherboard, Riser cable spacer, PSU mounting screws and spacer, mounting plates for components like fans and 4 rubber feet which wraps around the tubular frame. We also found an allen key included for the mounting screws. Note though, motherboard screws still use the Phillips head.
Universal mounting.
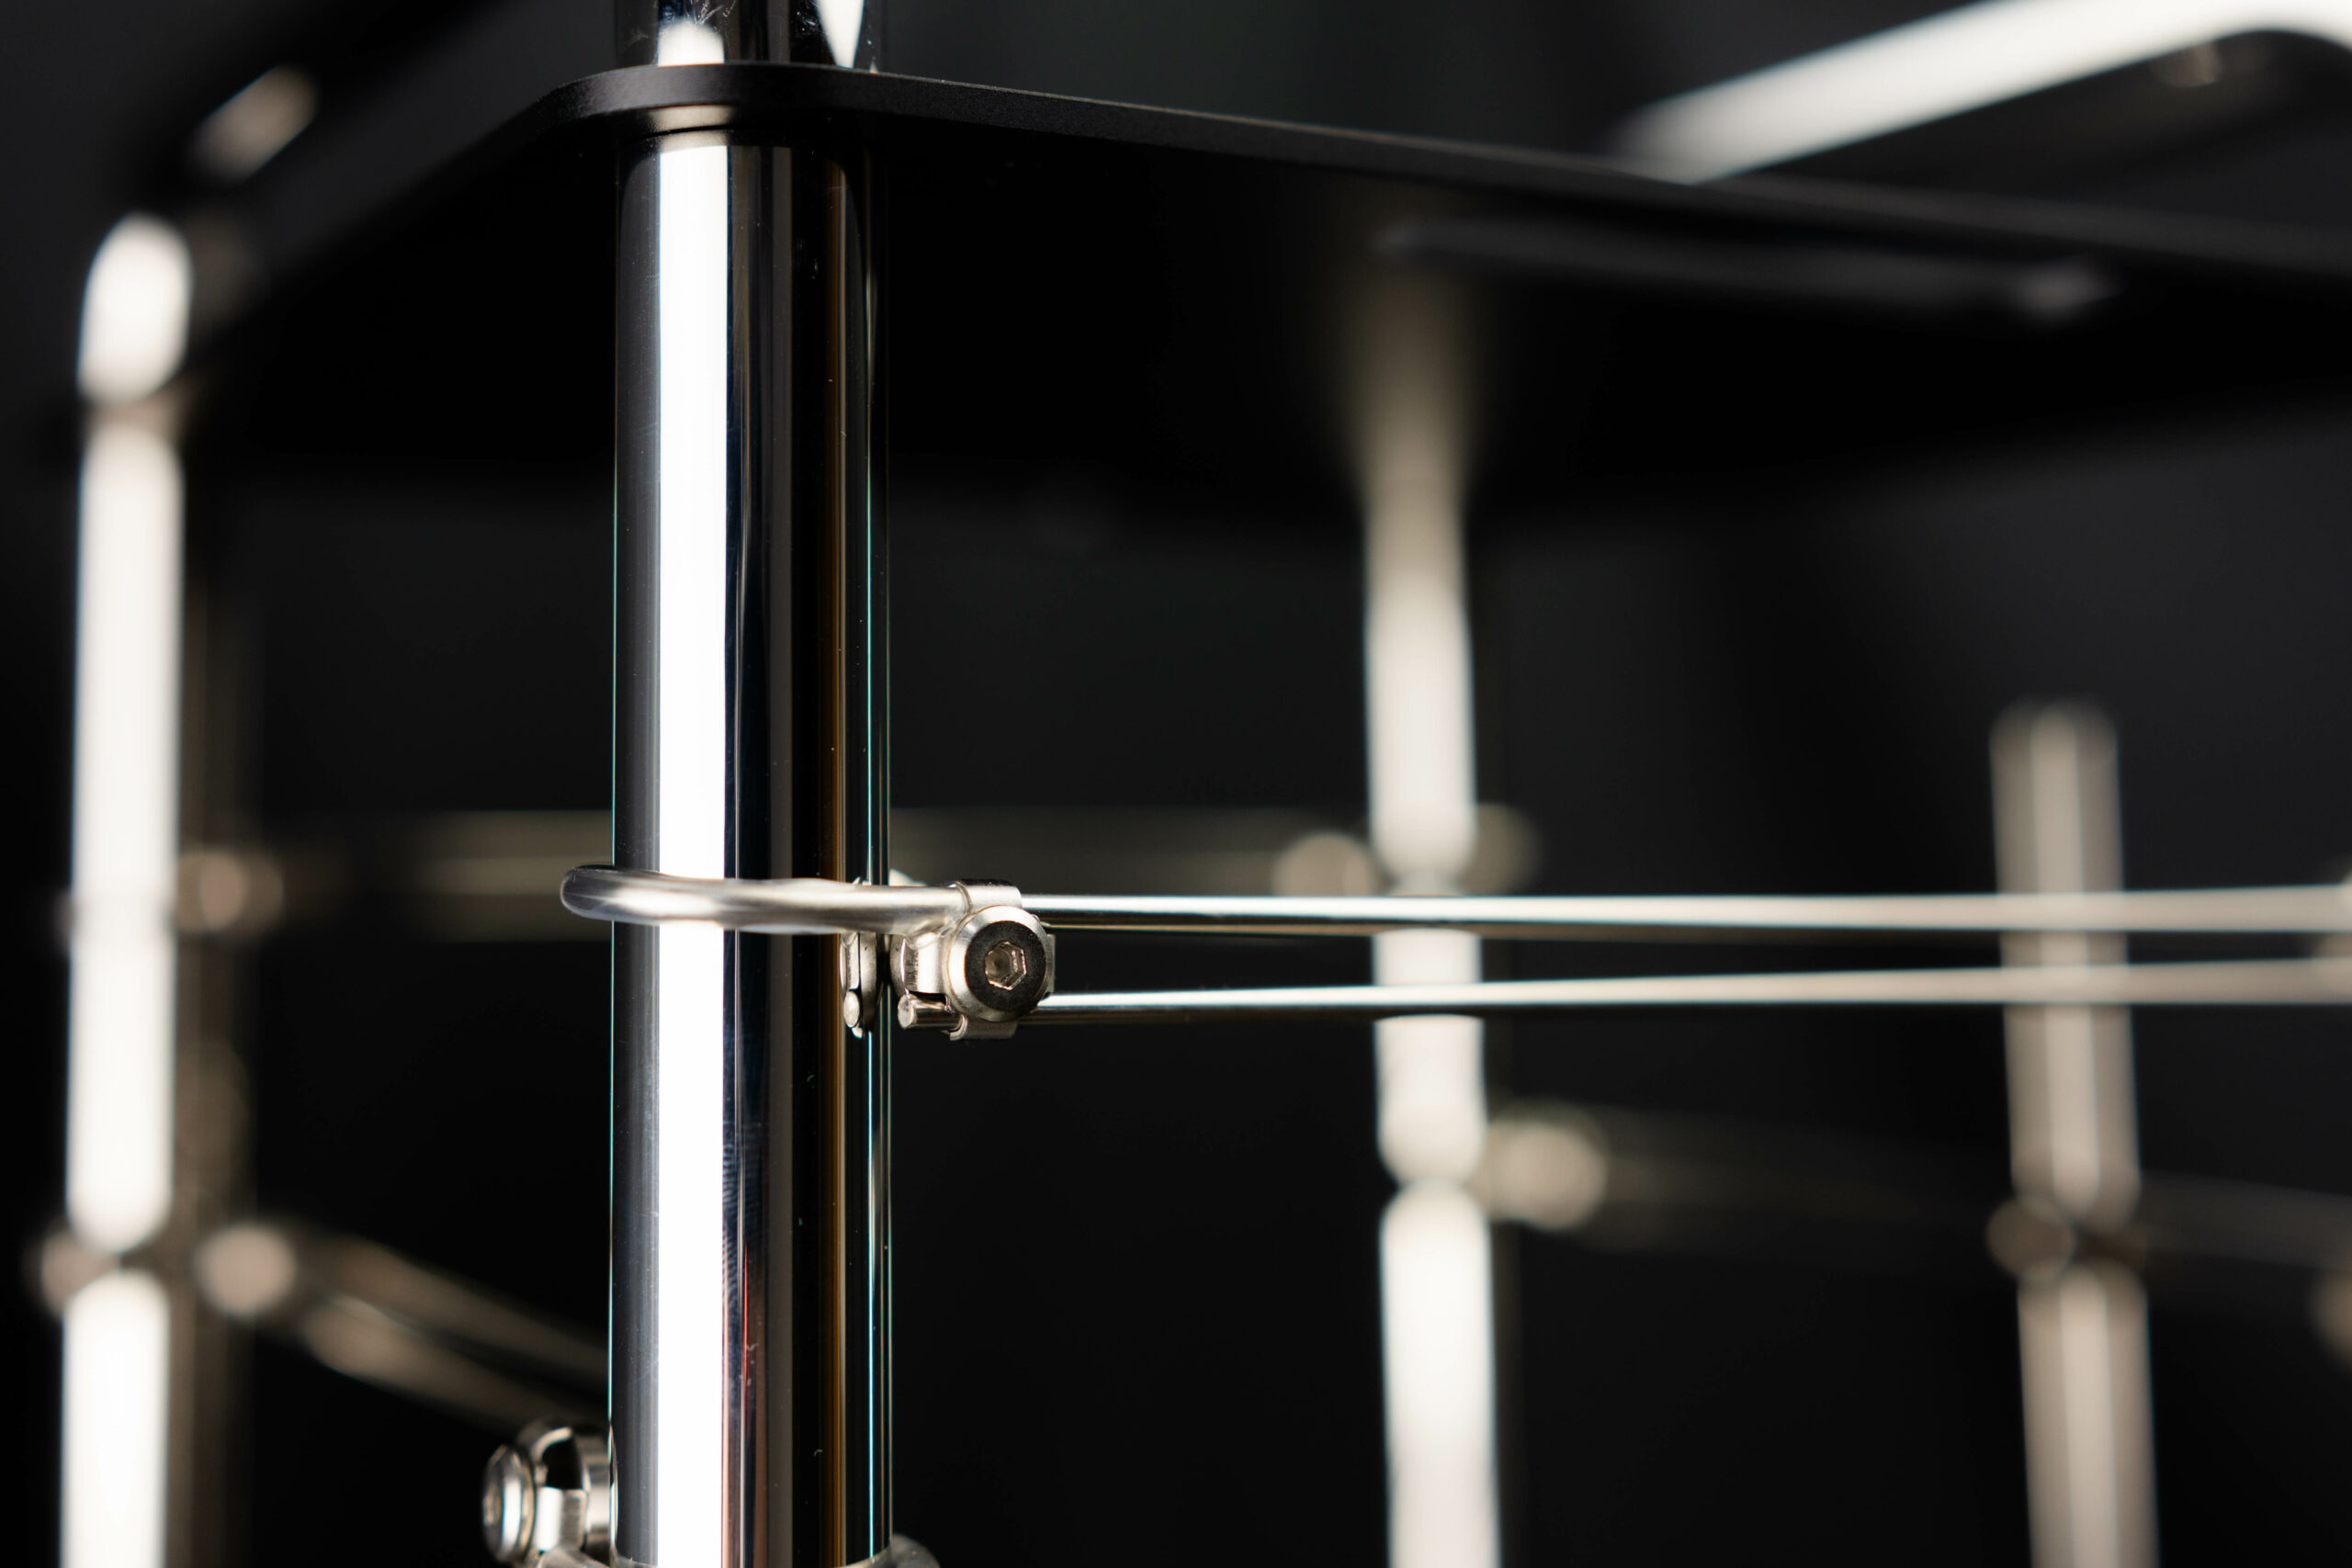
Before we dive into the mounting mechanism, let’s quickly go over the materials used in this chassis’s construction. The frame is made from Aluminium tubes with a top and bottom plate made from Steel. The whole construction is pushed together and there are no screws or pins holding the 3 components together. We haven’t tried removing the top or bottom so cannot confirm if there’s any sort of glue or sealant used to bind the parts together. We can assume that everything is push fit especially with Streacom’s precision in CNC machining, this is what we expect of them.
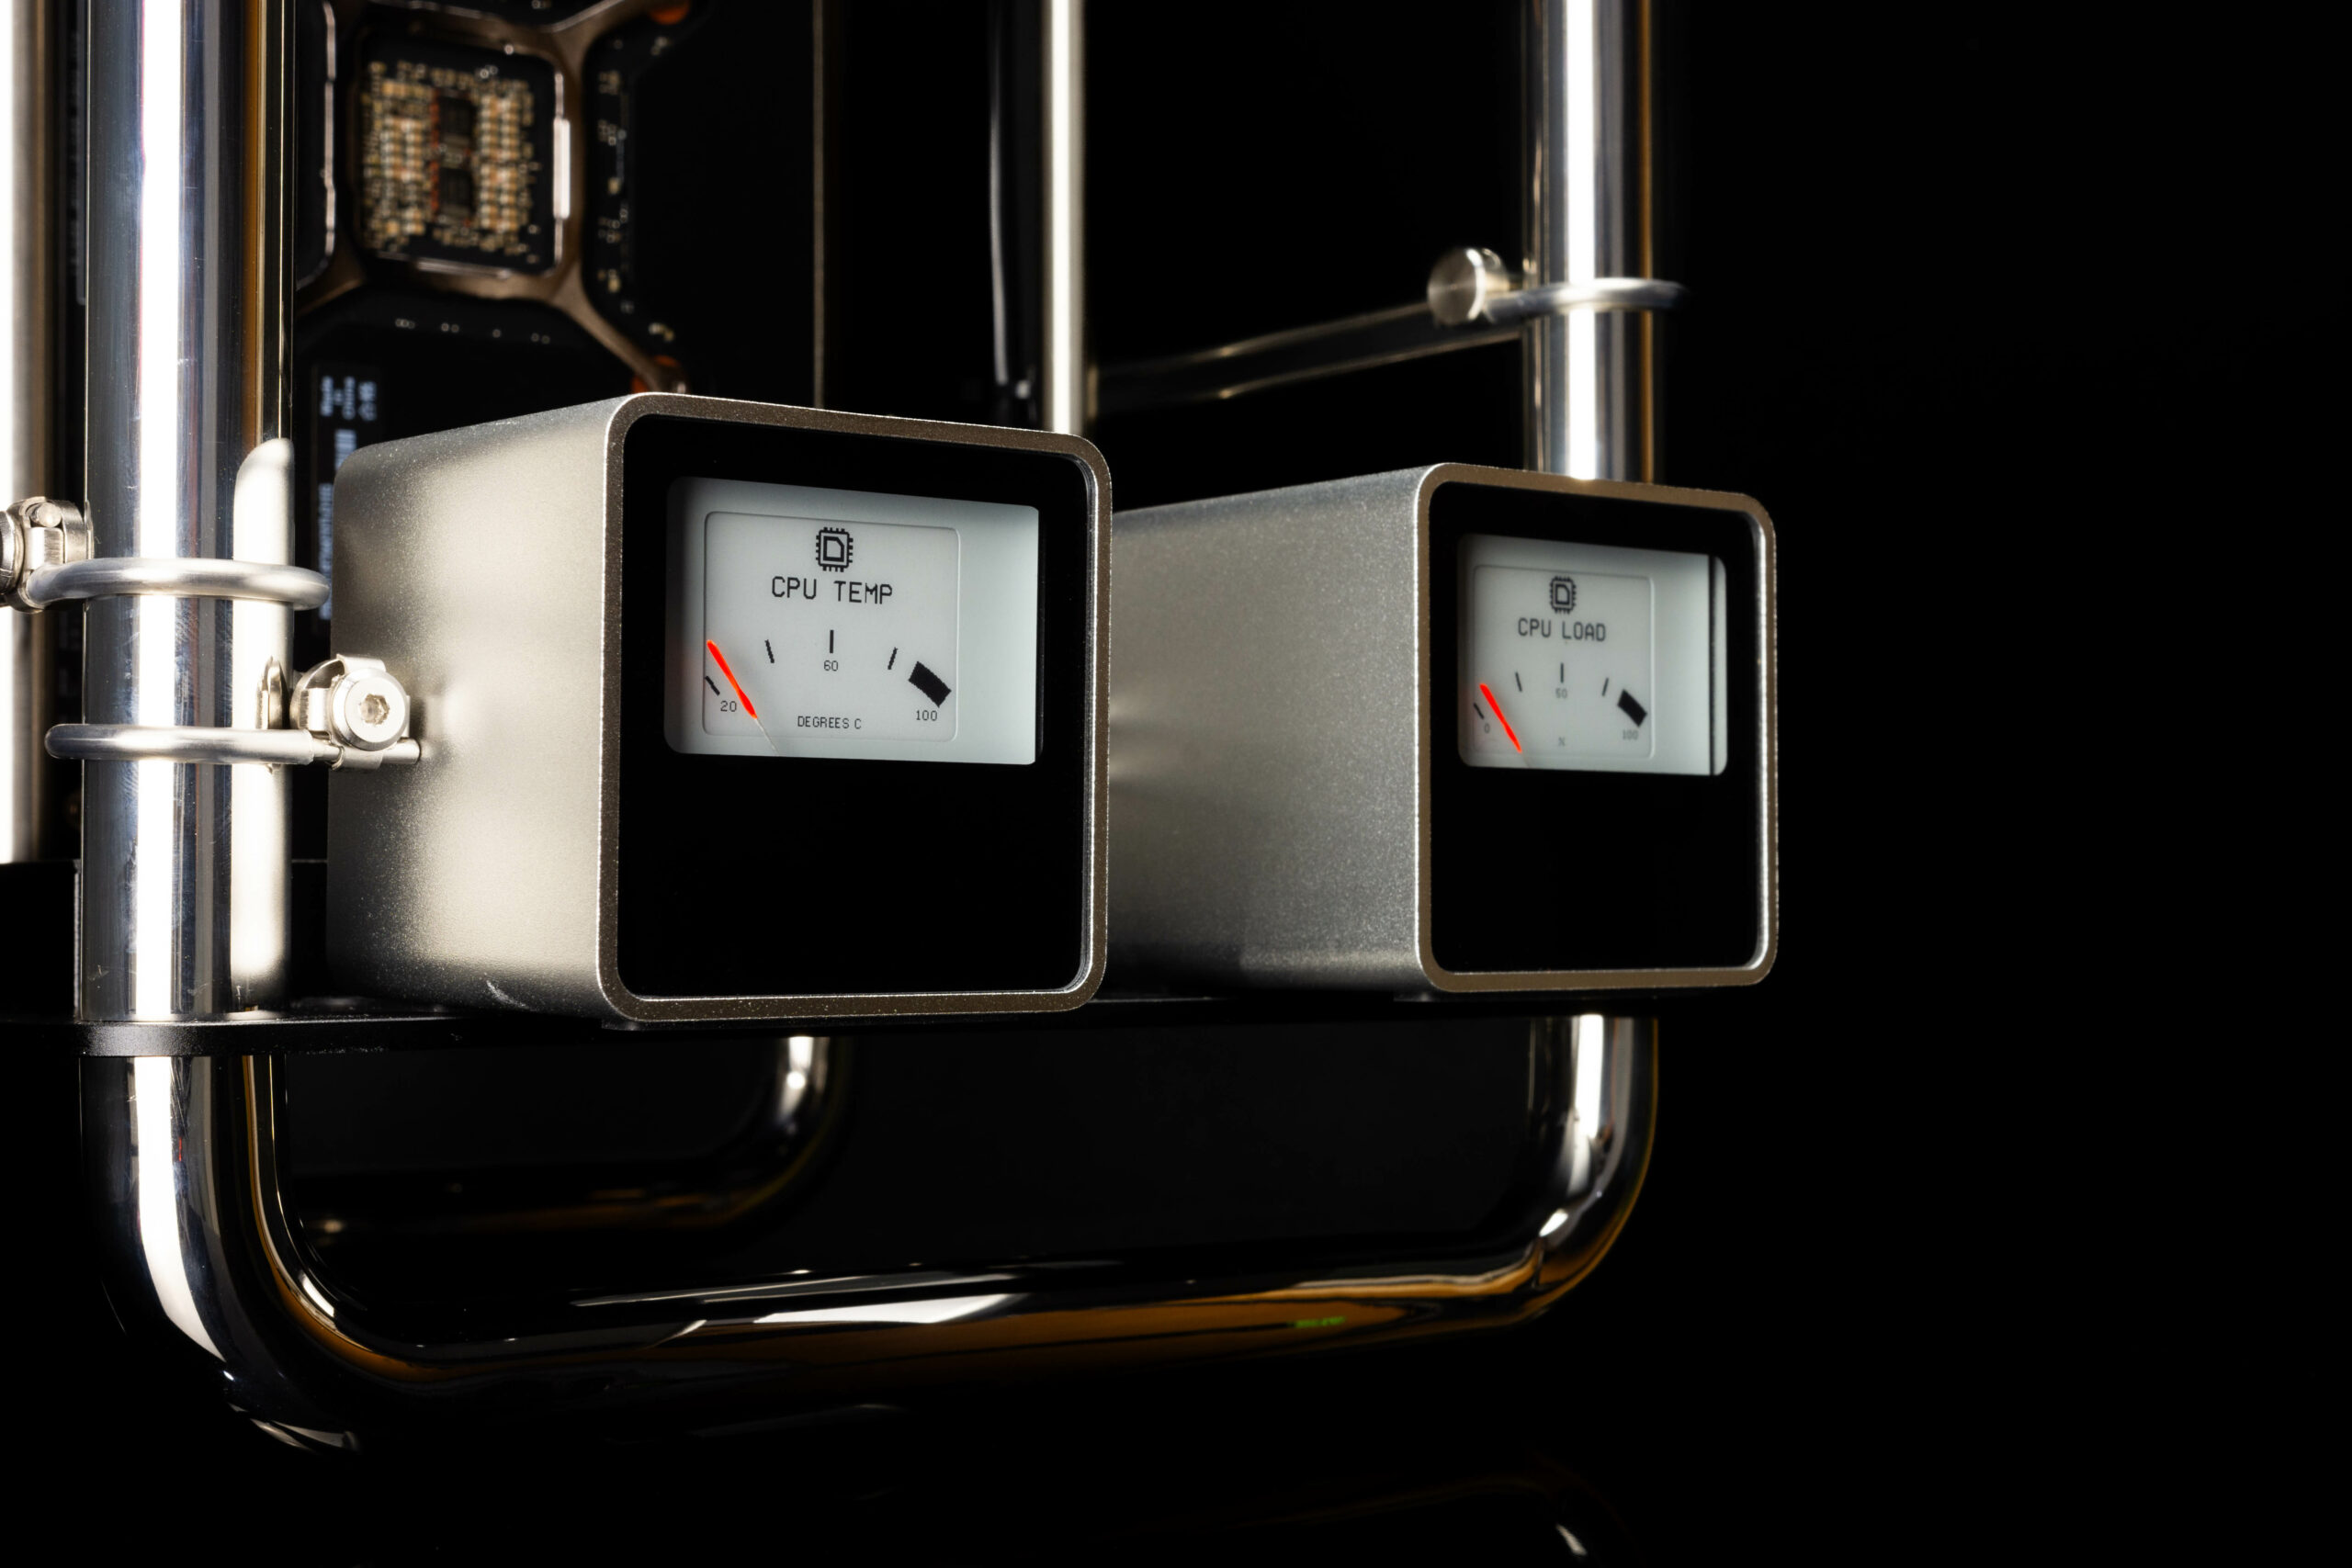
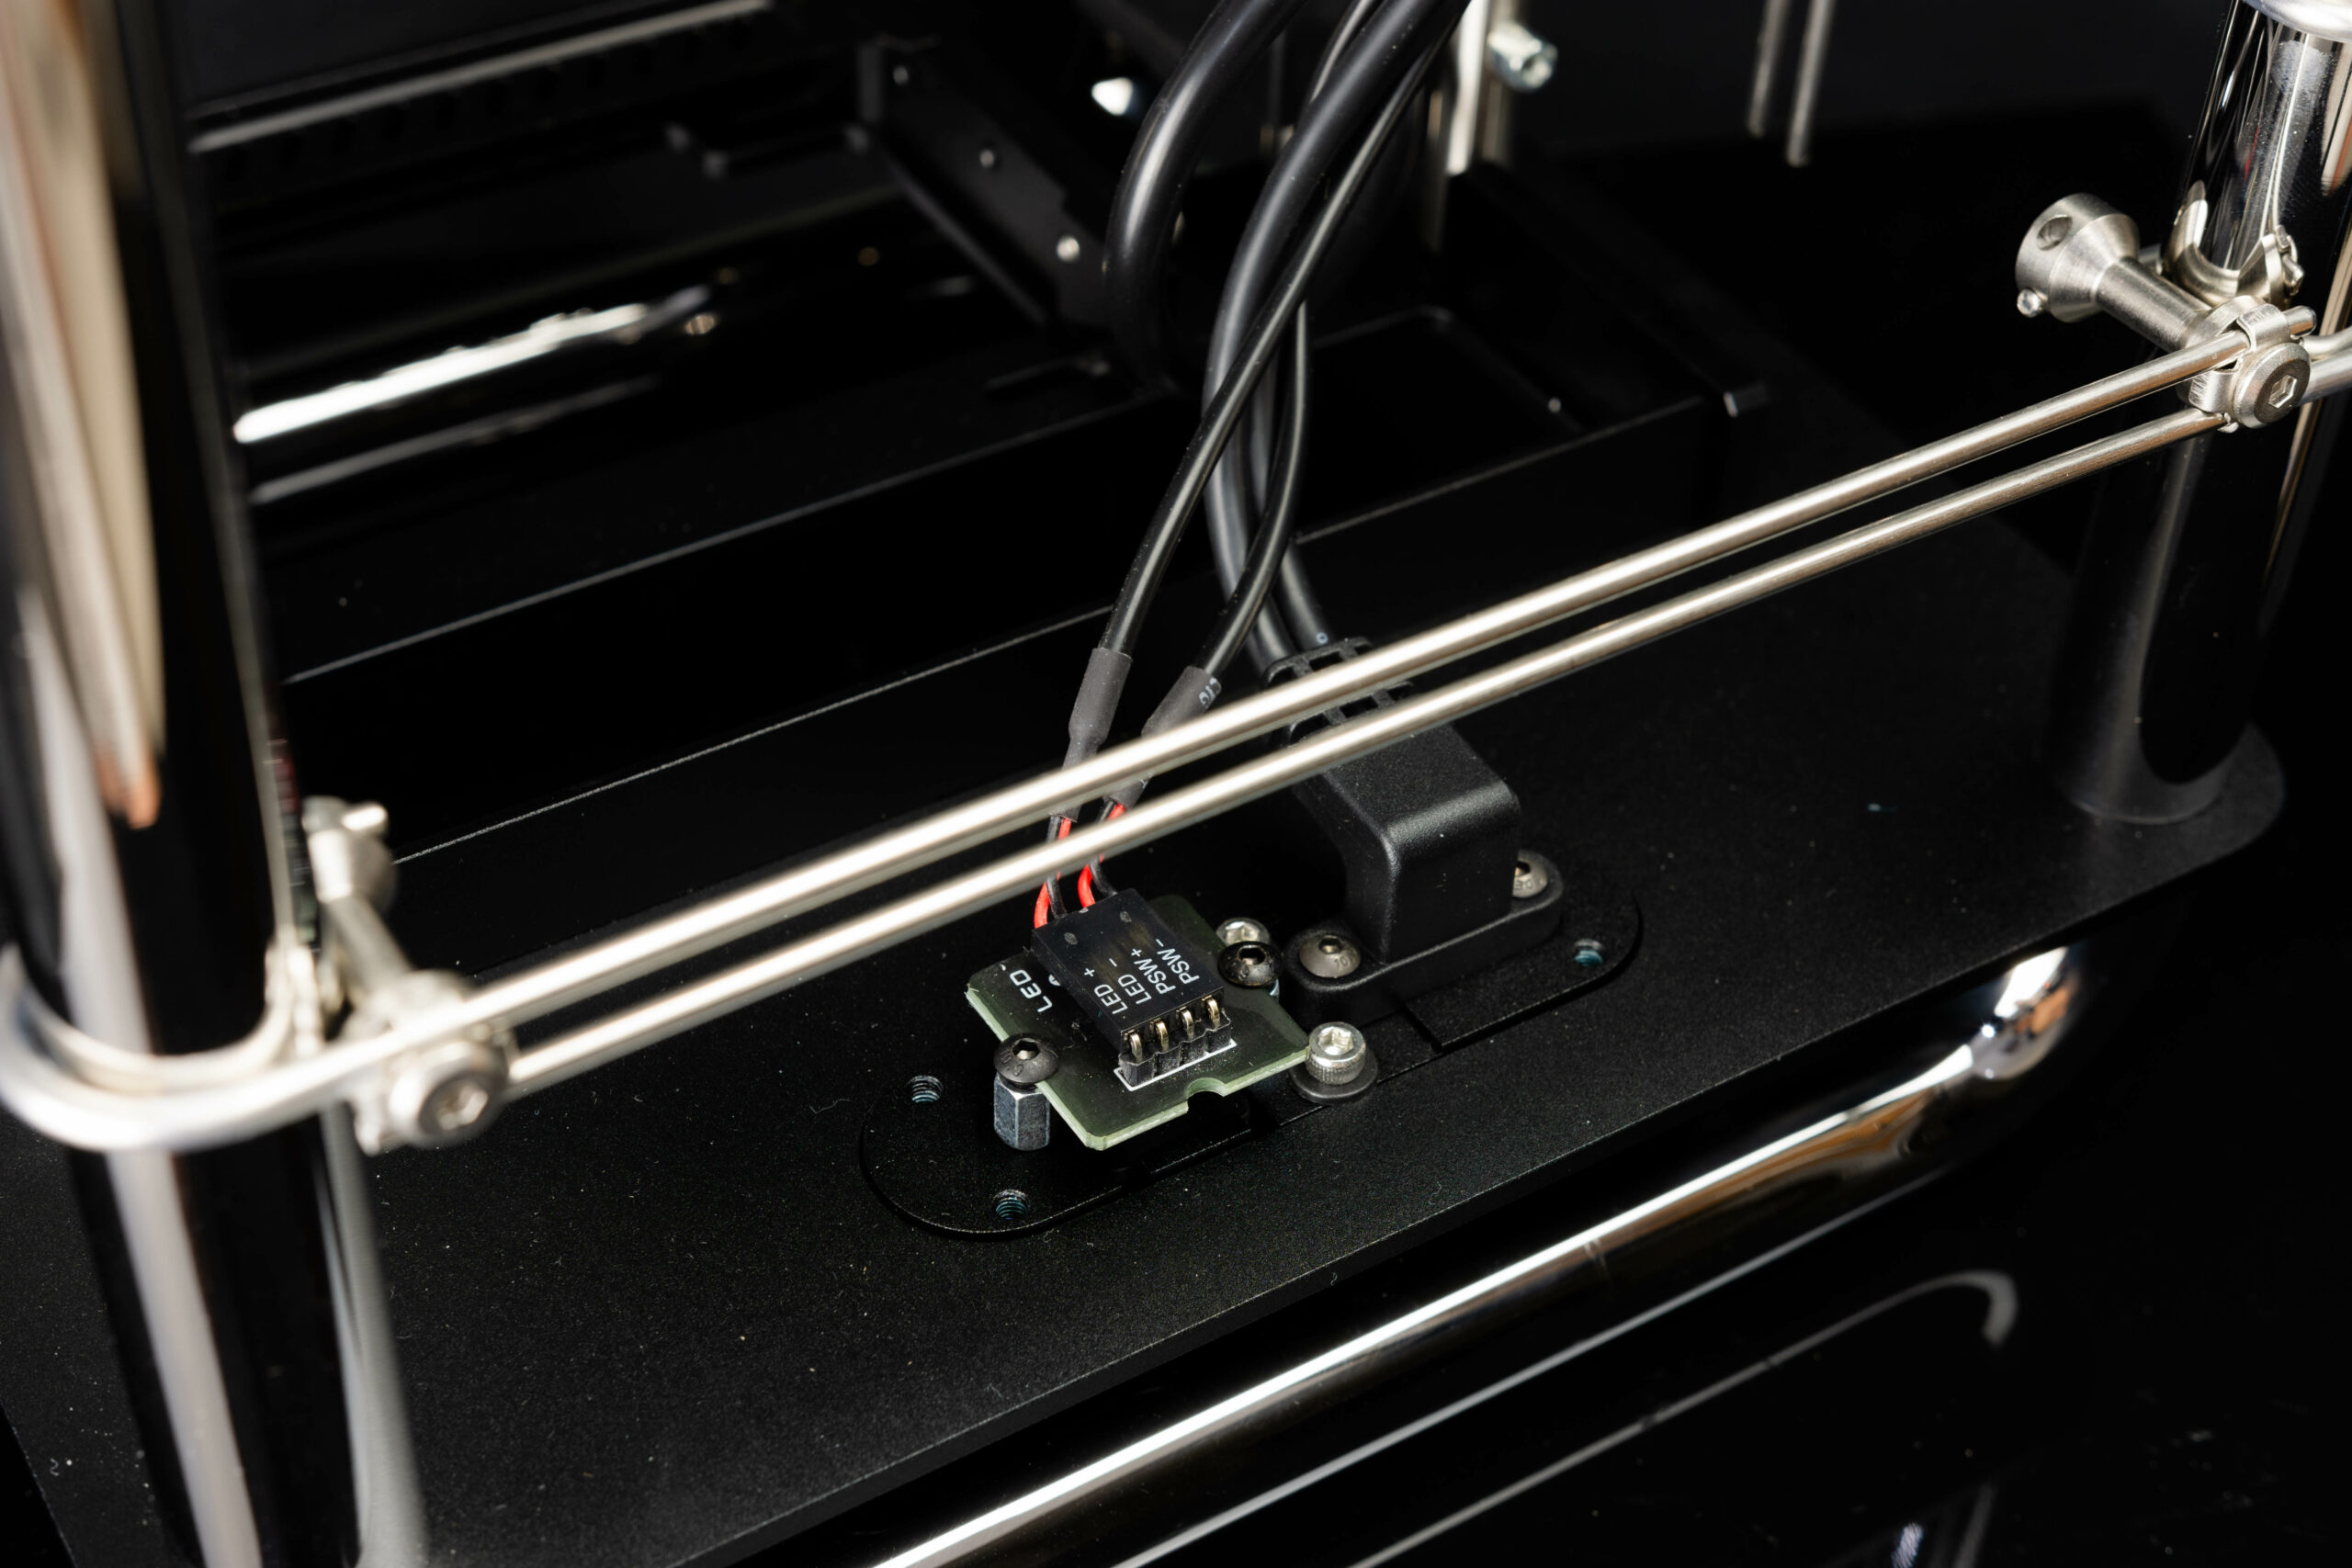
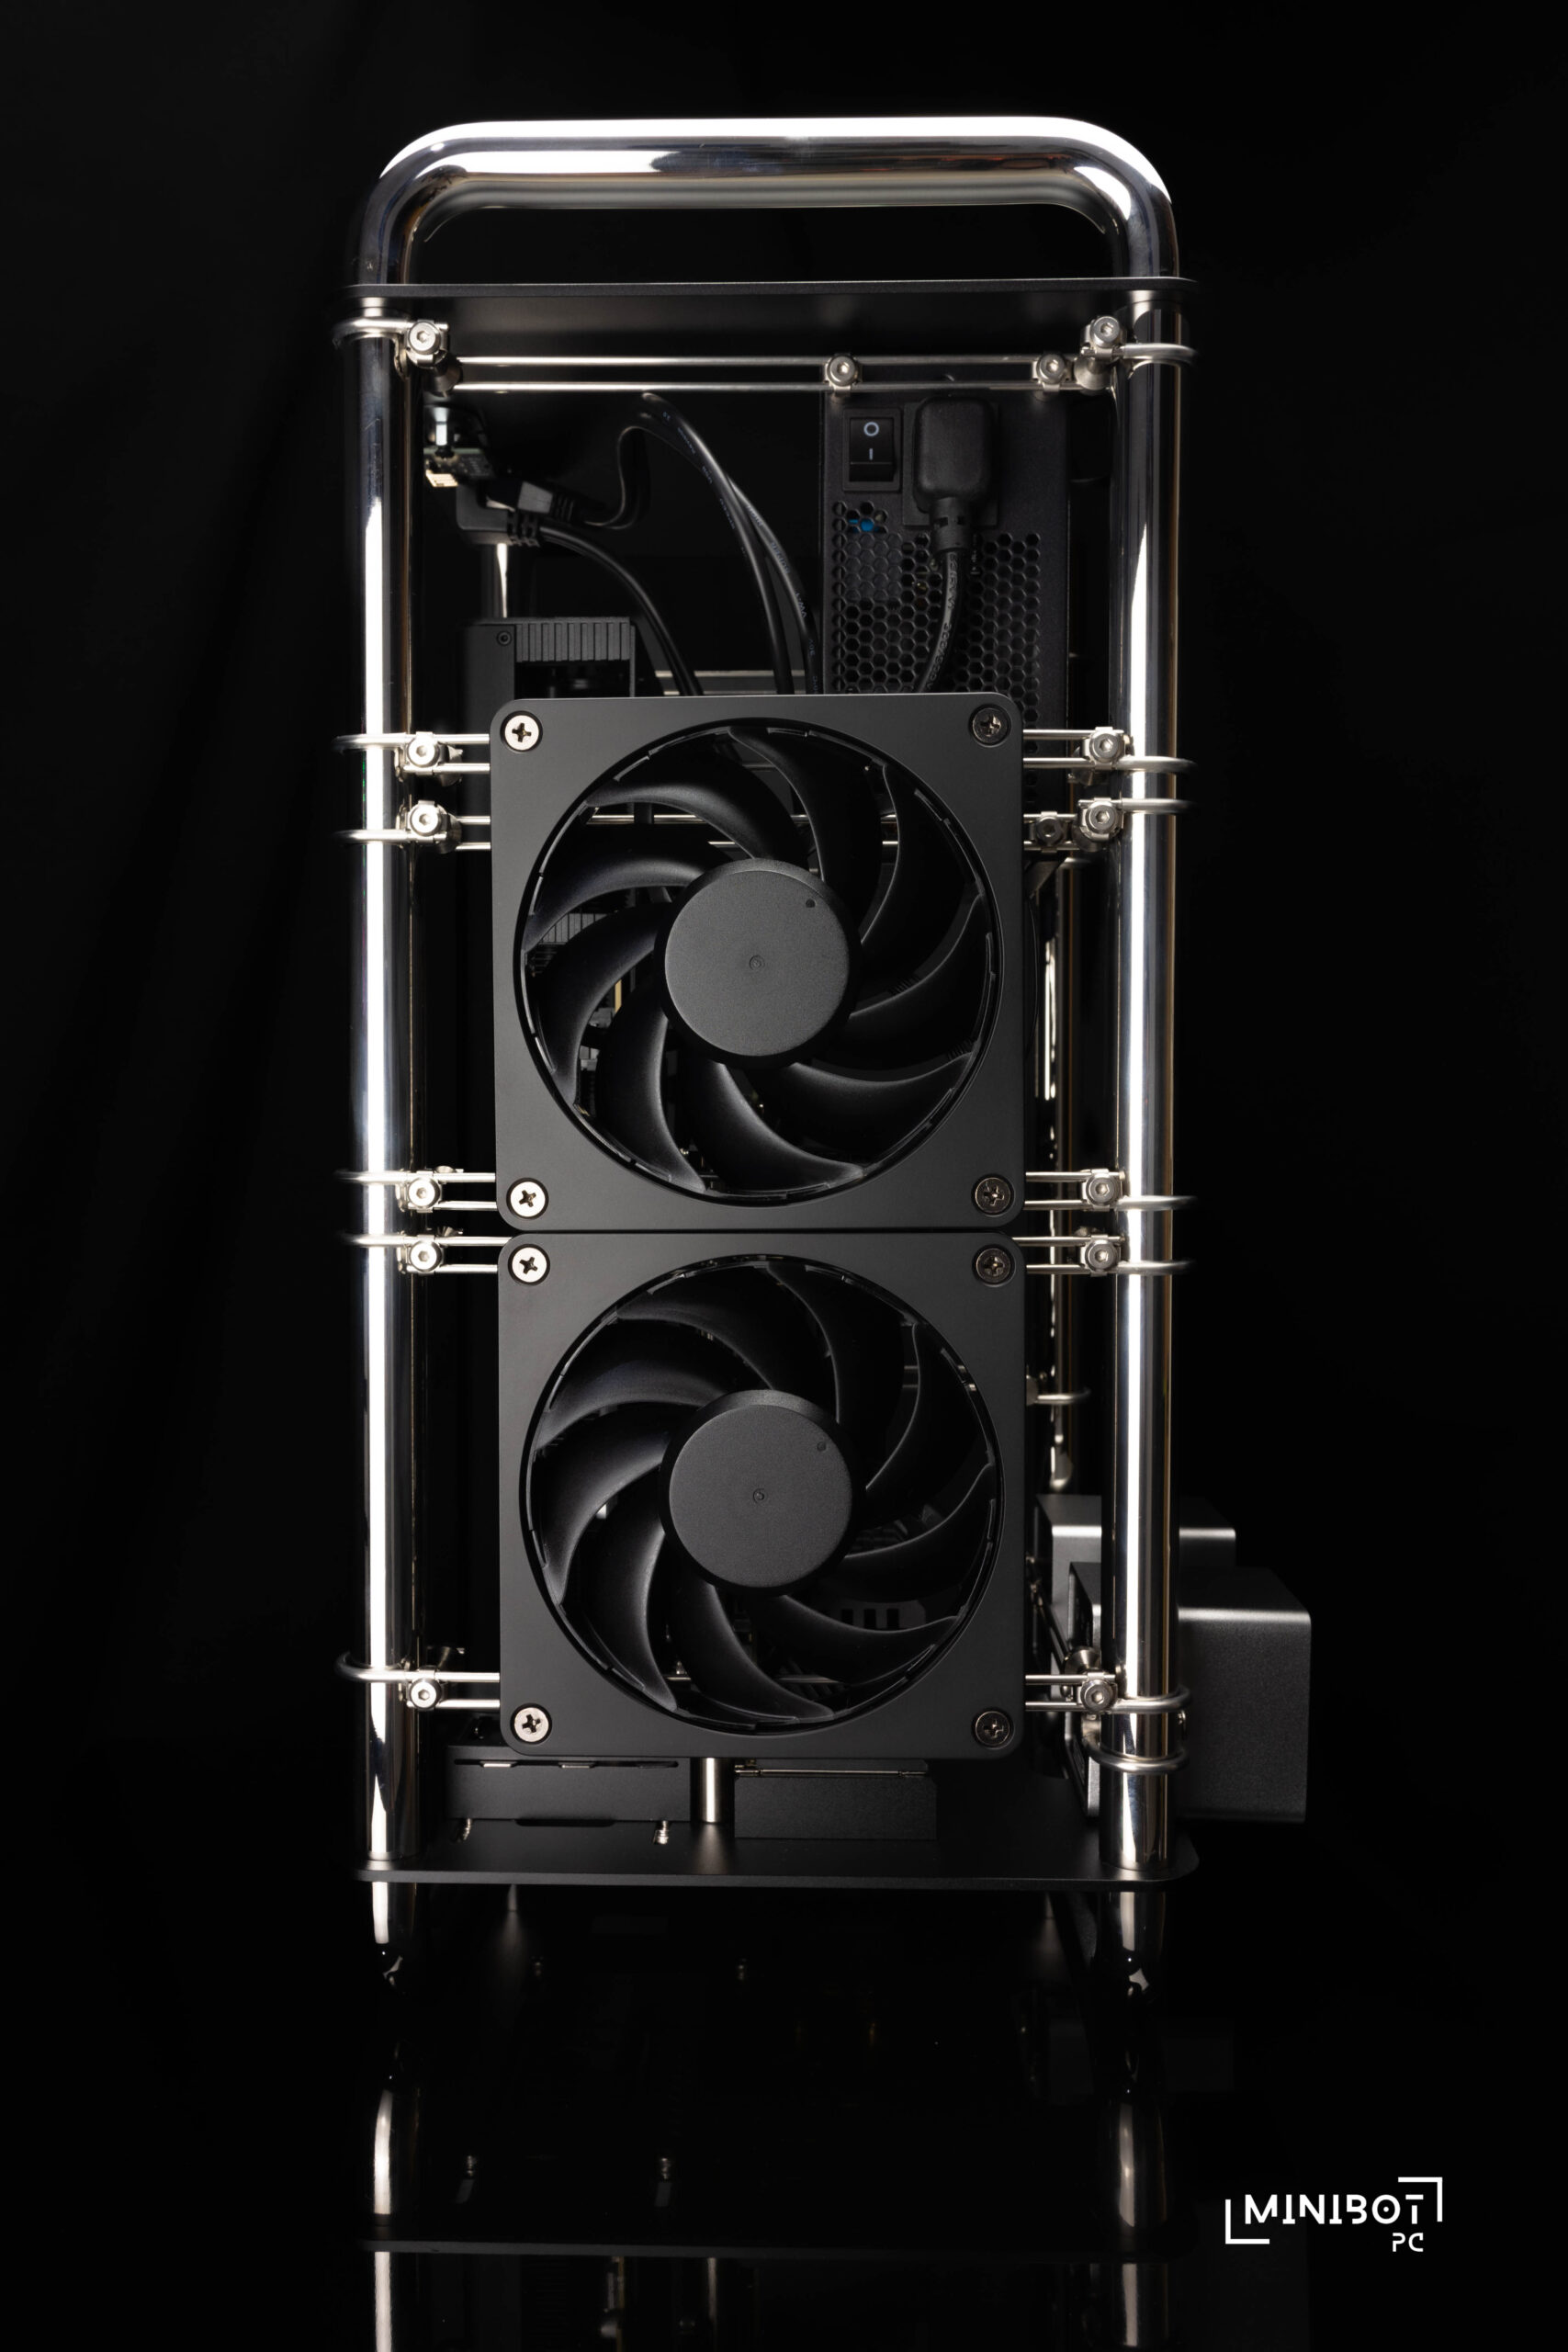
The mounting brackets are made up of several parts, which consist of an L shaped wire which curls back on itself to hook onto the tubular sides of the frame. The hooked areas of the wire are coated in a silicone/rubber material to avoid damaging or scratching the frame. This material also adds friction to allow the hooks to grip when tightened to the frame and provides a very secure fit. The wire hooks are held together by 2 pins which slide onto the wire and is held onto and screwed into place with an end cap. As you tighten the screws down onto the end cap, it tightens the wire onto the frame and thus provides a unlimited mounting mechanism to locate your components anywhere you want. The only side where we wouldn’t mount anything, would be the GPU side to avoid interference of the GPU fans. Further on you will see a few examples of how we used this mounting mechanism to install our fans and VU1 Dials into the system.
The motherboard is mounted in a 90 degree counter clockwise orientation. This means all your motherboards IO is facing downwards underneath the frame. If you’re someone who needs to access these ports regularly, this will not be a convenient system for you unless you orient the frame in a horizontal position, laying it flat essentially.
Simple IO.
This threw me a little bit when i first saw it but the only IO provided here is the single USB C port. I have looked up Streacom’s website and they do offer additional modules which can be installed into the empty slots (There’s 4 slots in total including the occupied one) for more USB A and USB C ports however in it’s stock configuration there is only 1 USB C available. Why they went with this approach we really don’t know, with the only reason i can think of being aesthetics since the addtional ports would mean additional wires to contend with. In a frame with no solid side panels, hiding wires would be this cases’s biggest downfall unless done right or making the cabling a part of the spectacle using custom cables.
In addition to the single USB C port there is also an on/off switch on the same plane as the usb port. This panel can be relocated to any of the other 3 slots on the top and bottom panel depending on your build requirements. In it’s stock configuration the panel was located at the bottom of the chassis as seen here. You will also notice that the on/off switch is pre wired into the switch so it’s just a simple case of matching up the wires to your motherboards front panel which we really liked.
GPU Mounting.
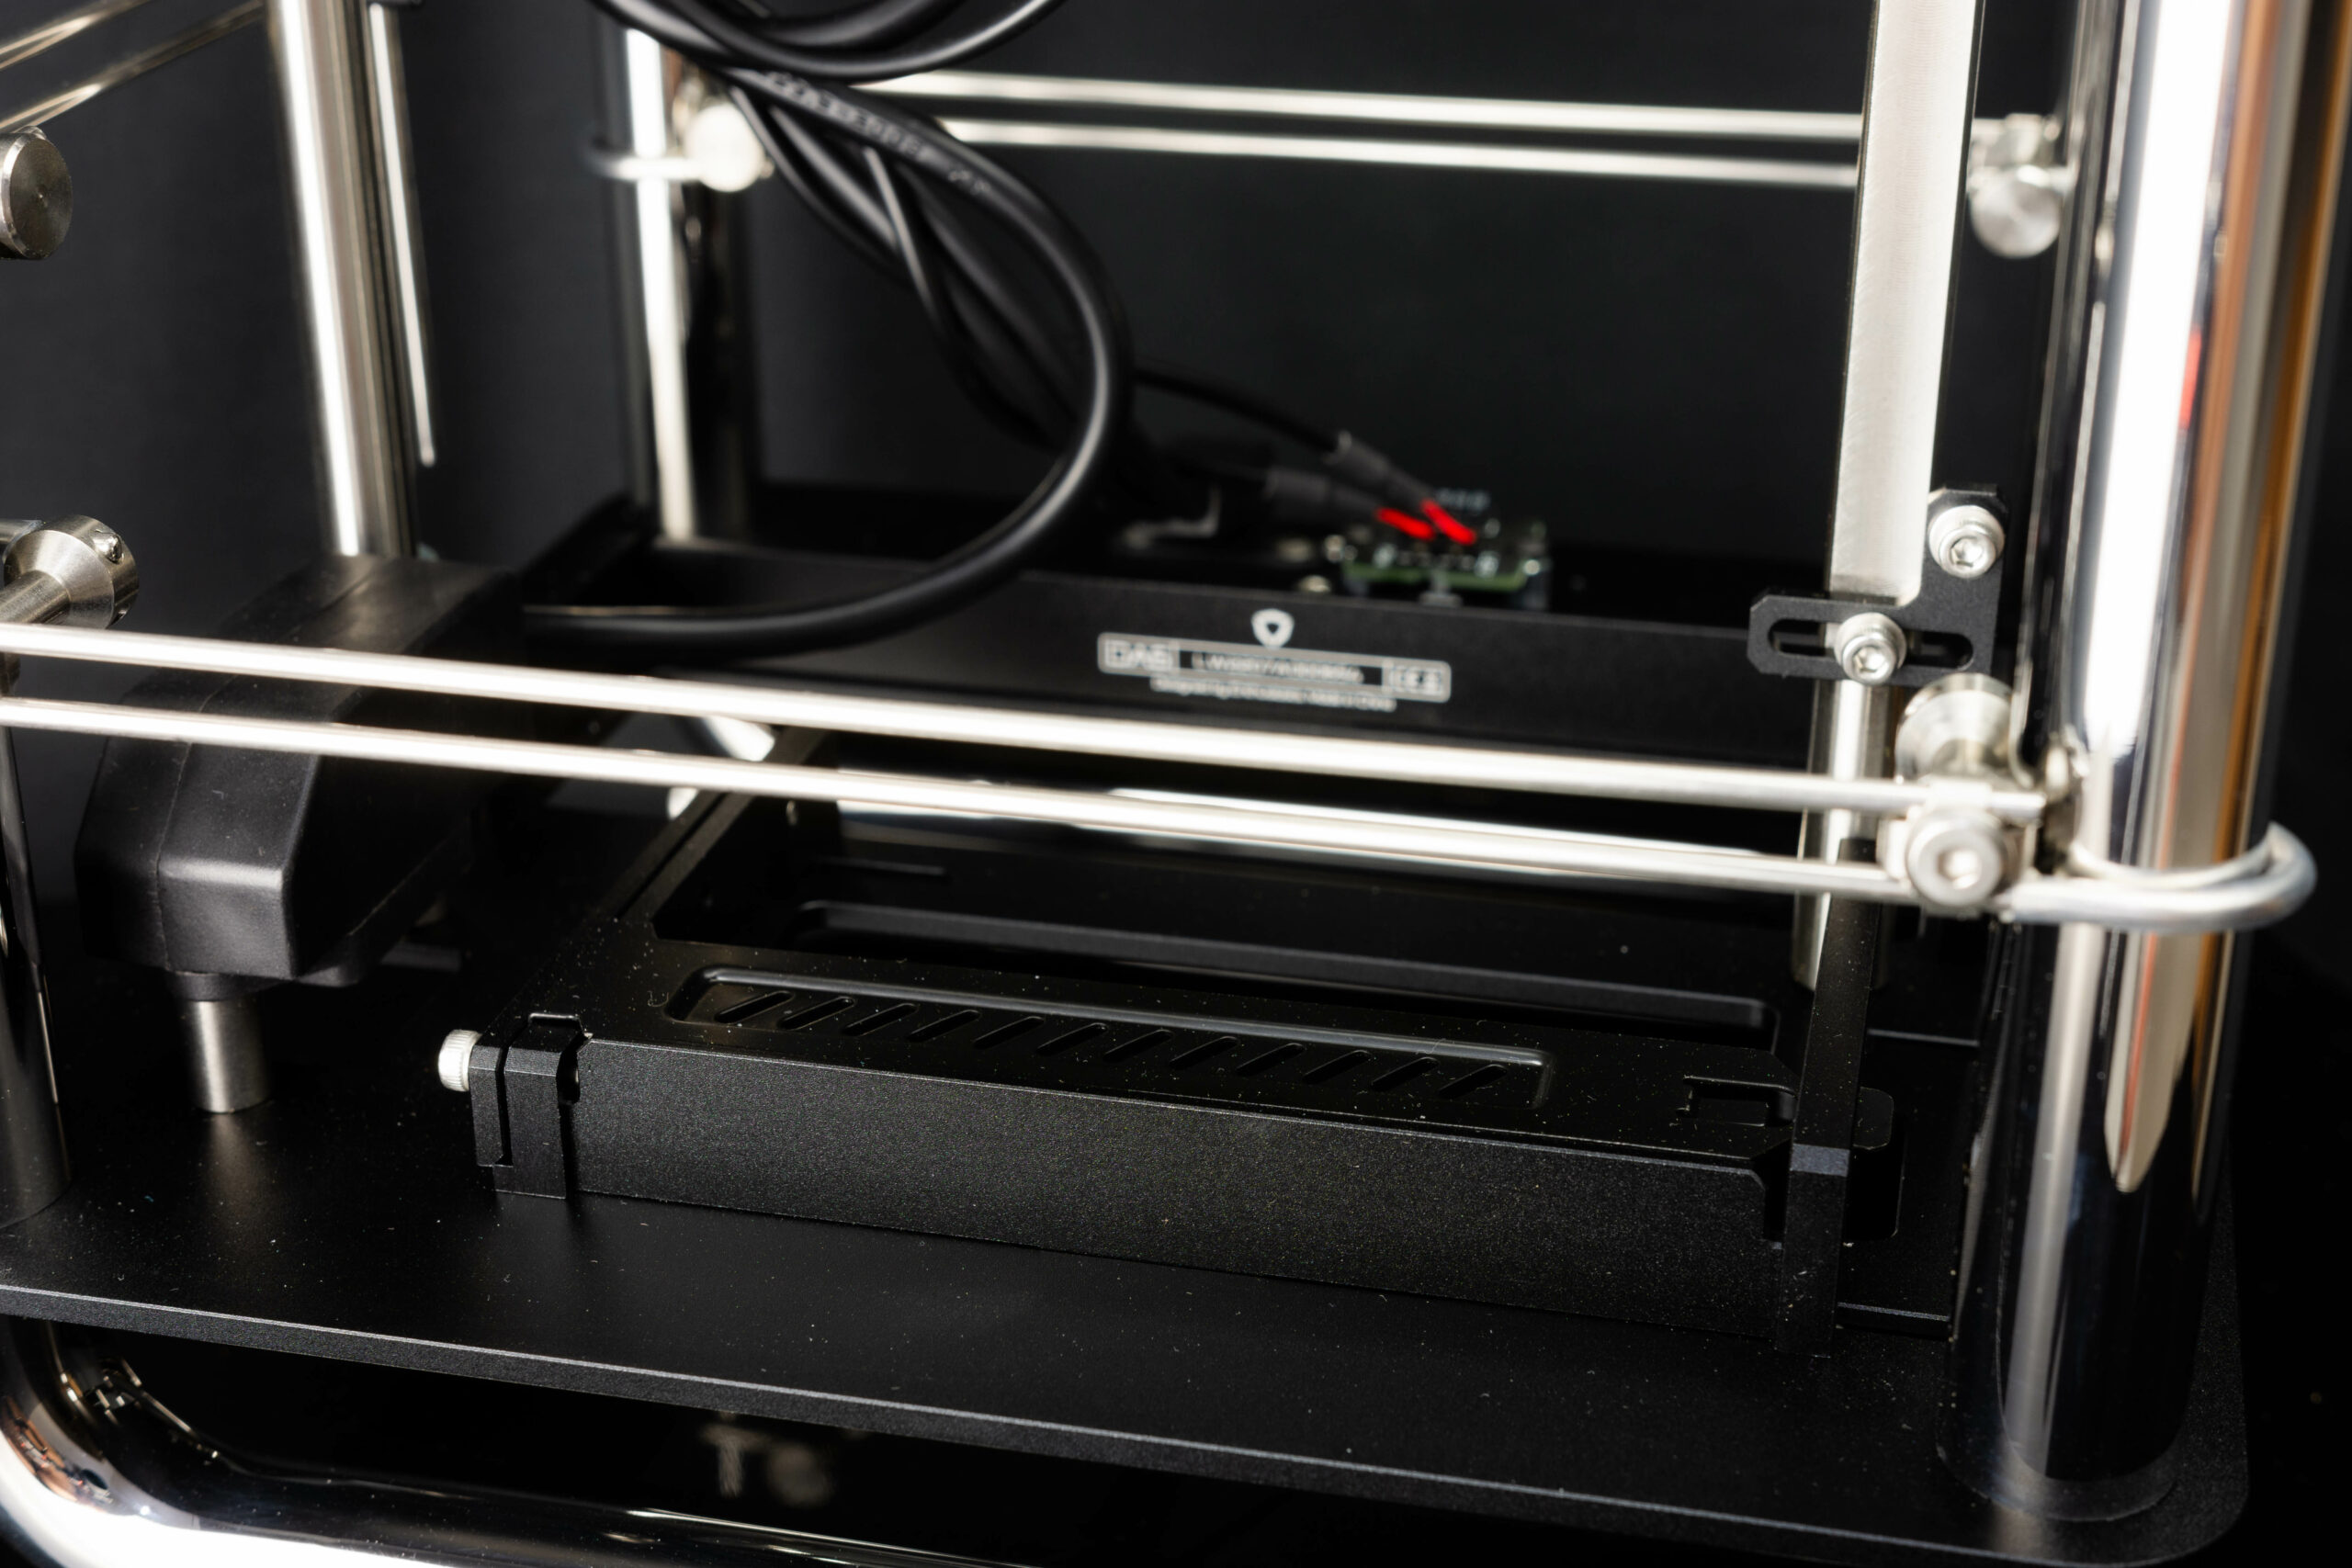
The Graphics card mounting is rather simple. It is basically the same as mounting a graphics card traditionally in a case. There is an end plate held in place by 2 small screws, undo these (but not all the way) to release the plate. The graphics card goes in at an angle before dropping into place and is secured by the end plate with the 2 screws as before.
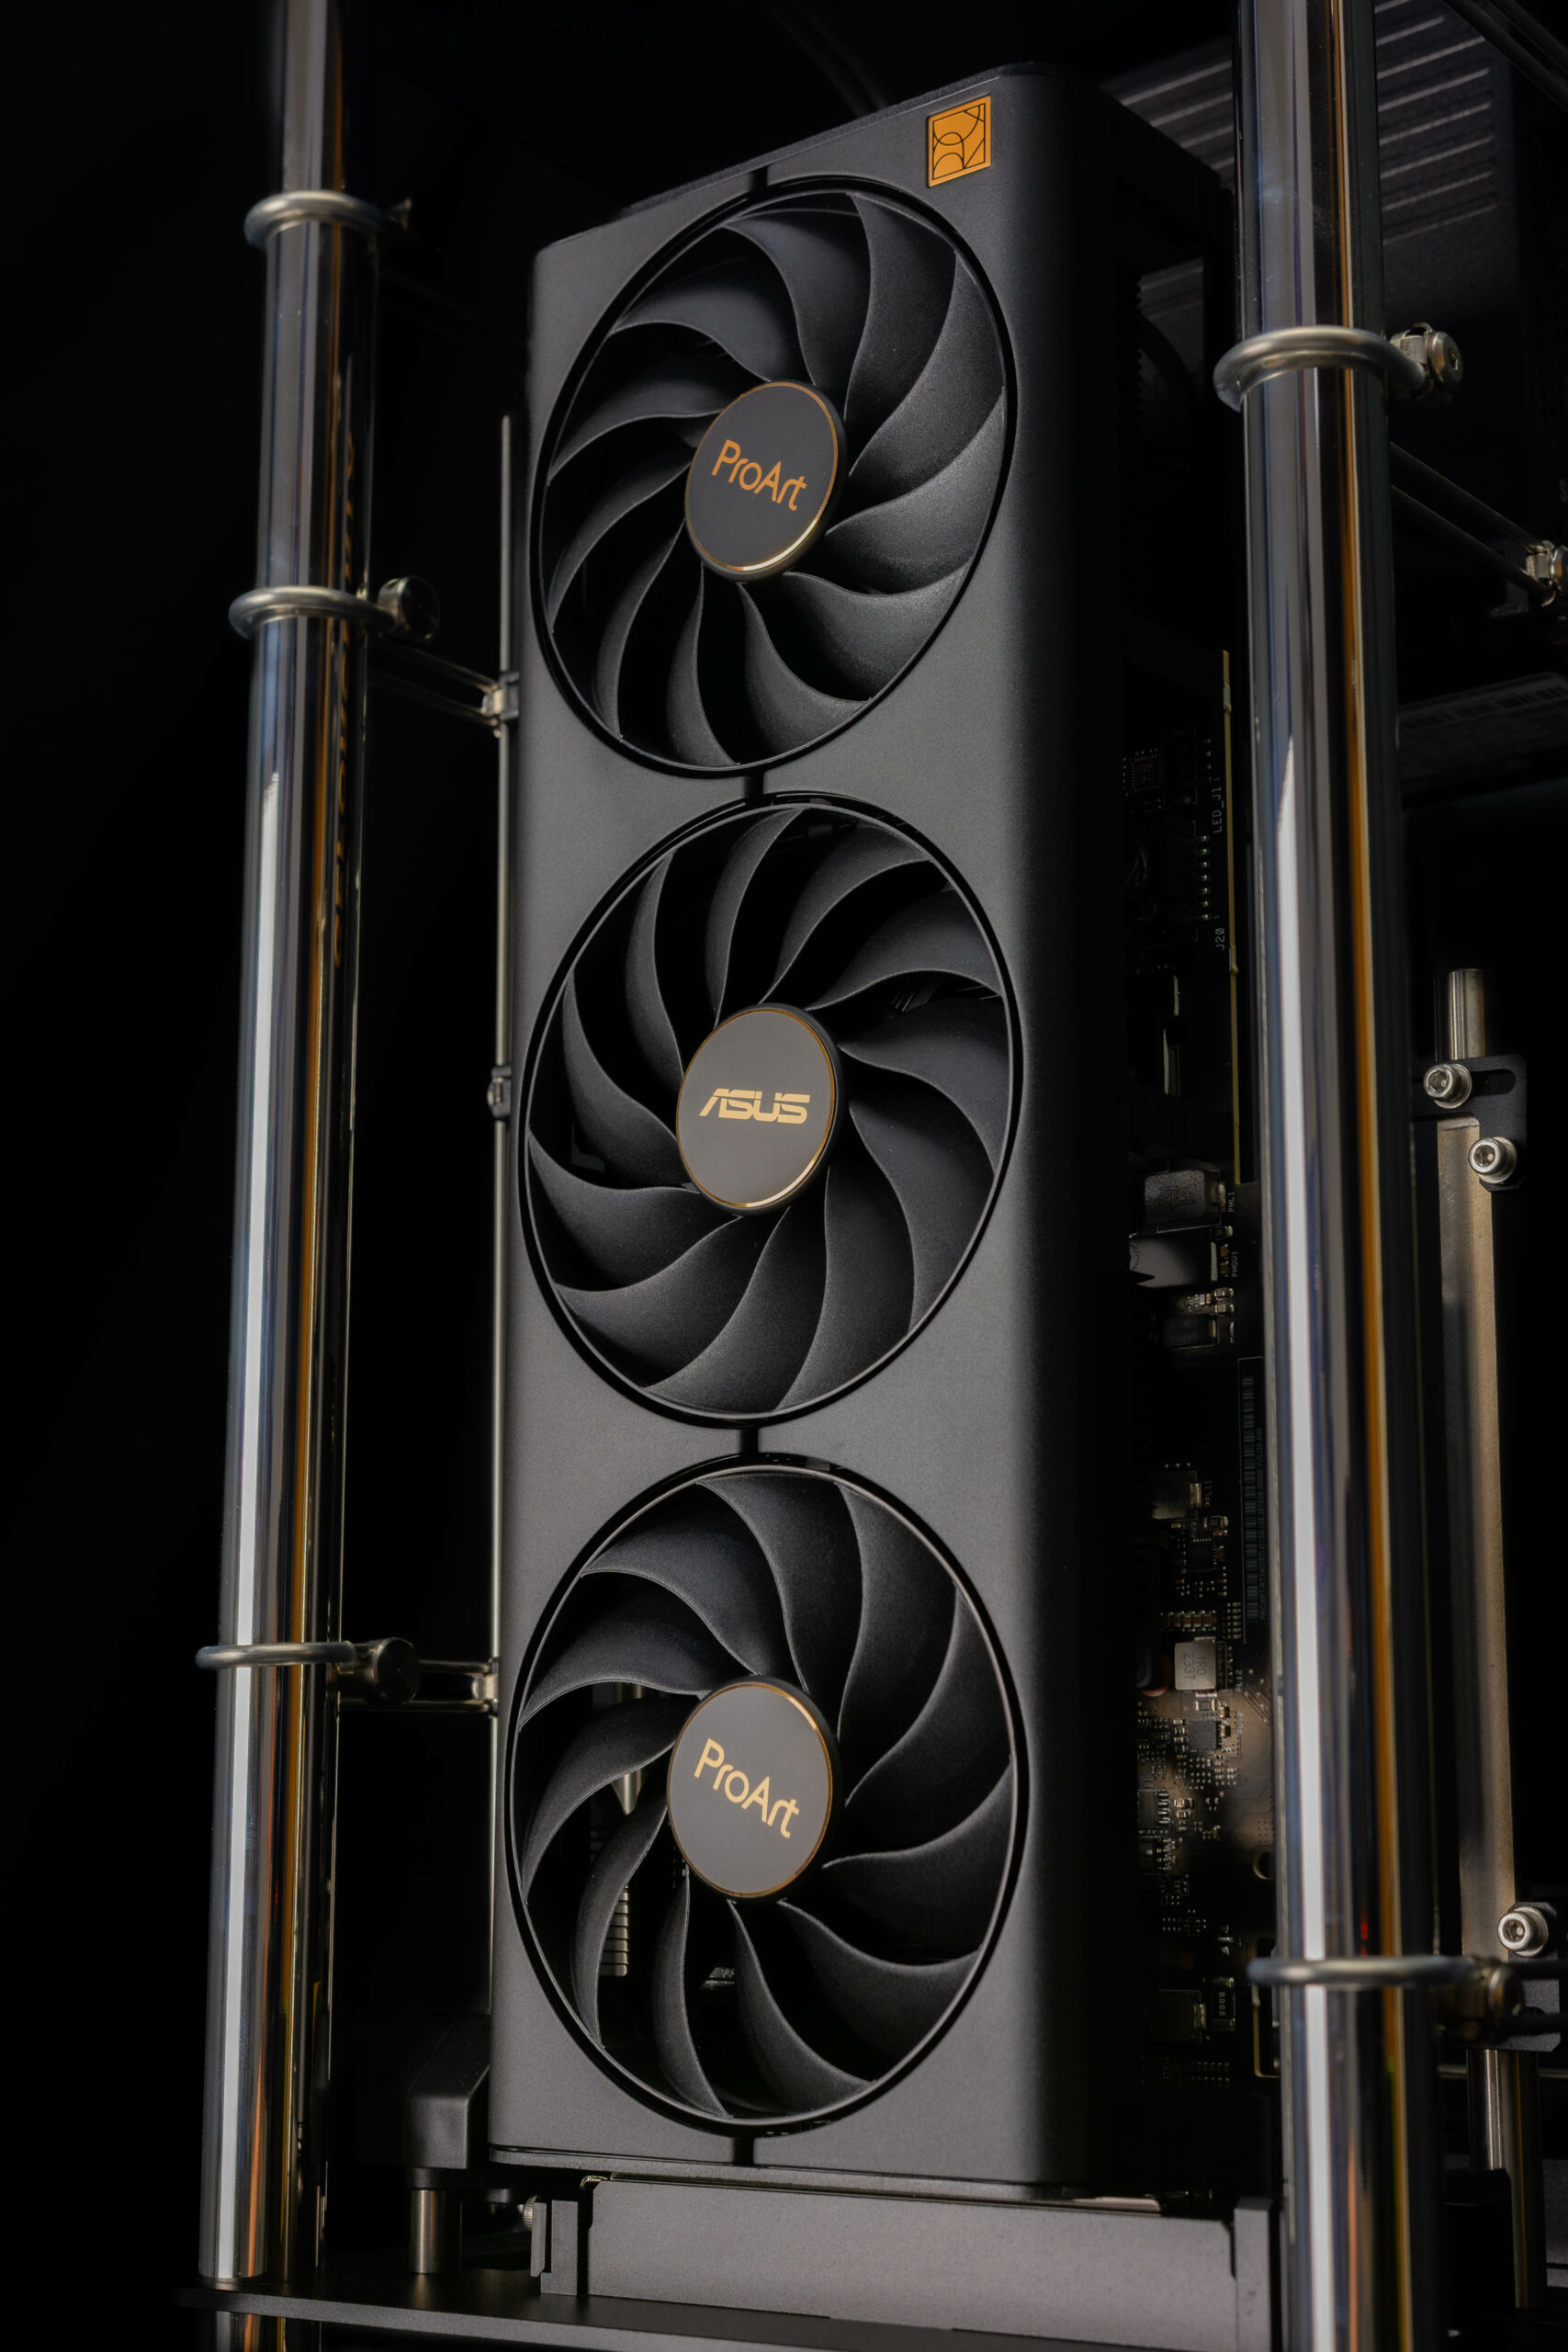
The graphics card slot allows for upto 3 slot cards although larger coolers can fit if they are wider than 3 slots as there are no physical barriers to stop you. Your only limitation is the physical 3 slots and the tubular frame on either side of the card as shown here.
PSU Extension.
The nature of the frame with the PSU located at the top means an extension power cable is needed to allow for a clean bottom exit. This is preinstalled for your convenience though we did move the cable to a slightly different location due to the final orientation of the PSU we decided on.
Streacom also conveniently includes mounting brackets which are held in place in a similar manner to the mounting bracket wires. Not only that, they also include reusable zip ties! A small detail but highly appreciated.
Mounting examples.
As an example we have illustrated a few mounting positions for fans and Streacom’s very own VU1 Dials. Adjusting the wires for the mounting points is relatively easy, with loosening the screws to relieve pressure to allow for vertical adjustment.
We did find it tricky if you removed the wires completely, it’s a very fidgety process and takes abit of patience. Once you get the hang of it though, it gets easier though i still found myself a little fustrated a few times.
Final Thoughts.
With this frame being as unique as it is, it’s hard to compare it with anything else out there in the market. There isn’t anything else out there that is remotely close to this in terms of its versatility and mounting configurations. However this frame isn’t perfect and it does have a few shortcomings, some of which are inherent to it’s design.
The Good:
- Versatile mounting configurations.
- PSU can be mounted in multiple orientations.
- Can accommodate large graphics cards.
- Light weight built from robust materials.
- Expandable IO
- Premium finish up to Streacom Standards.
- Frame can be placed in multiple orientations, it is not solely a vertical frame.
The Bad:
- Mounting mechanism can be tricky to install.
- Riser cable not included.
- Only 1 USB C for IO.
- Motherboard orientation means all your IO ports are underneath if the frame is placed in a vertical orientation.
- Tubular frame is a finger print magnet.
- The nature of the mounting wires means you cannot mount things closer to the centre of the frame.